
Guide for operators
How to show your site at its best.
This guide explains step by step how to claim your site on ViaCamp and keep it up to date so that campers find it and are happy to send an enquiry. You don't need any technical knowledge, just about 30 minutes and a few good photos.
1. Find and claim your site
Most sites are already on ViaCamp, often with data from OpenStreetMap. So that you can manage the details yourself, you claim your site once.
How it works
- Open via.camp and create a free account (email and password, or with Google).
- Look for your site using the search field at the top of the map and open it.
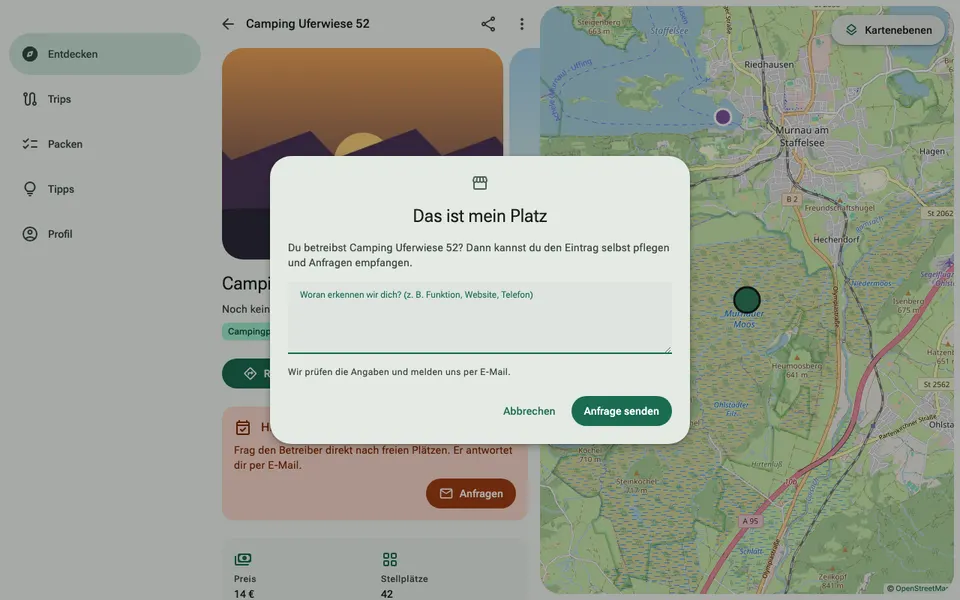
- Tap the three dots at the top right and choose “This is my place”.
- Briefly tell us how we can tell the site belongs to you, for example your role, the website or a phone number.
- We check the details and get back to you by email. After that you will find the “My site” section in the menu.
2. Photos that make people want to visit
Photos are the first thing campers see. Sites with good pictures are opened more often and receive more enquiries.
How it works
- Open your site and tap “Add photo” in the photo strip. An image can be up to 10 MB.
- The newest photo becomes the cover photo. So upload your best picture last.
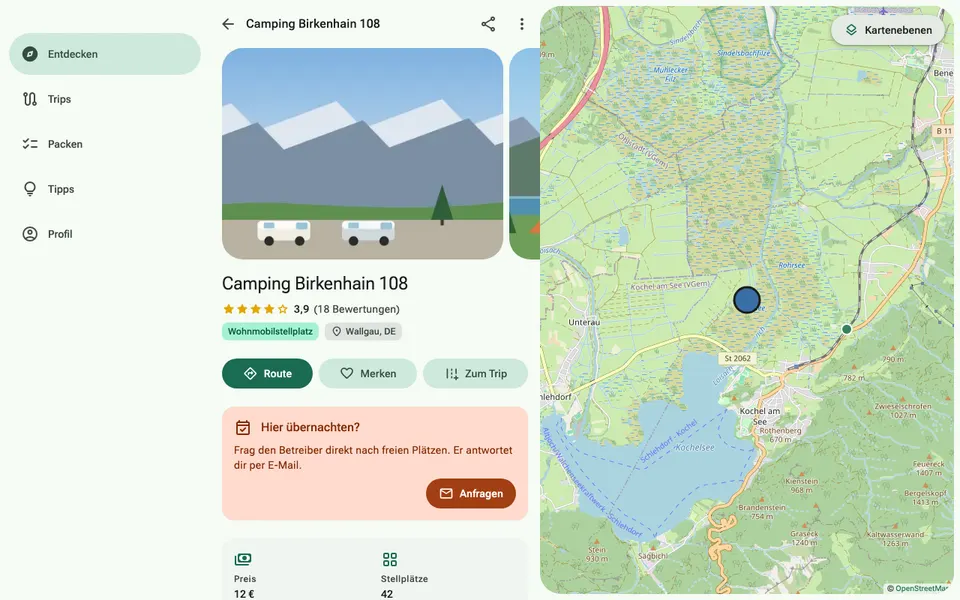
- Five to ten pictures work well: an overview, a typical pitch, the shower and toilet block, water supply and waste disposal, the surroundings.
Quick check
- The cover photo shows the site, not the logo
- The shower and toilet block looks clean and bright
- No recognisable faces or number plates of guests
3. The description
The description answers the questions campers would otherwise ask by phone. Write the way you would talk to a guest: short, friendly, specific.
How it works
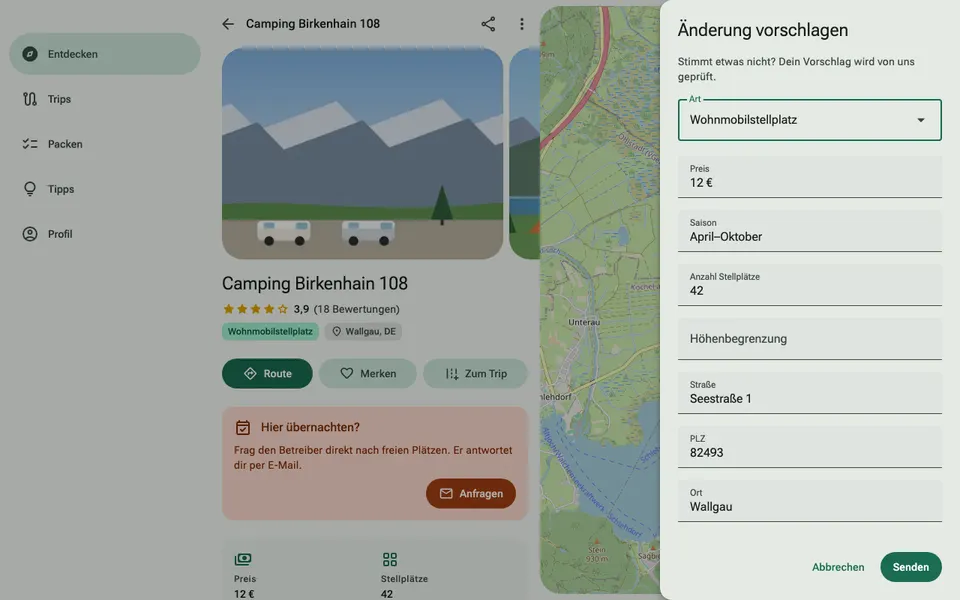
- Open your site, tap the three dots and then “Suggest a change”. For your own site, the change applies straight away.
- Start with what makes your site special: by a lake, peace and quiet, the view, close to town.
- Then mention the practical things: season, pitch size, electric hook-up, dogs, arrival times, prices.
4. Keep facilities and facts up to date
Campers filter by facilities, for example electricity, showers or dogs. If a box isn't ticked, your site won't appear for that filter.
How it works
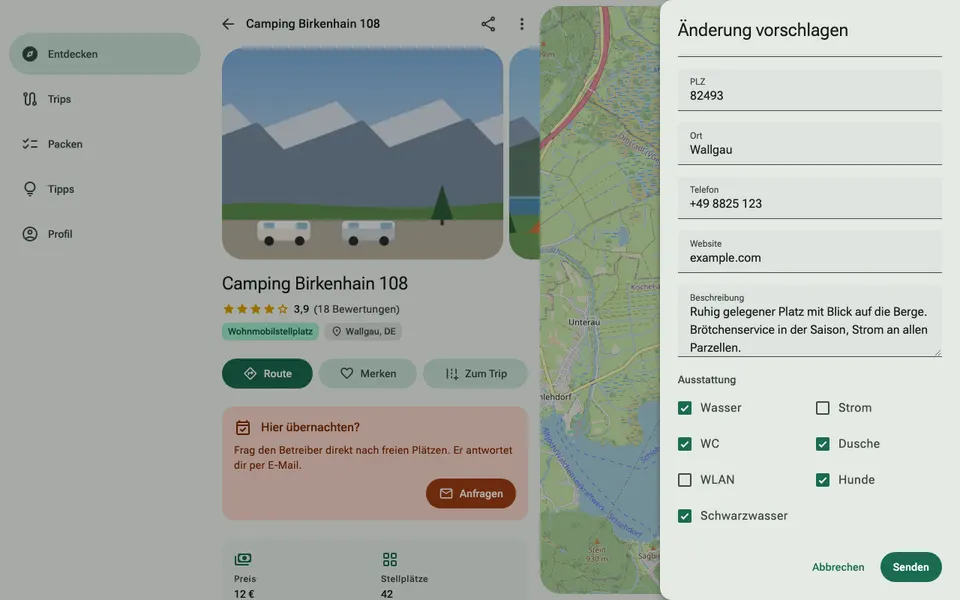
- In the “Suggest a change” window, tick the boxes under “Facilities” at the bottom for water, electricity, toilet, shower, Wi-Fi, dogs and black water disposal.
- Enter the type of site, price, season, number of pitches and a height limit, if there is one.
- Check your address, phone number and website. The website is shown as a link on your page.
5. Answer enquiries quickly
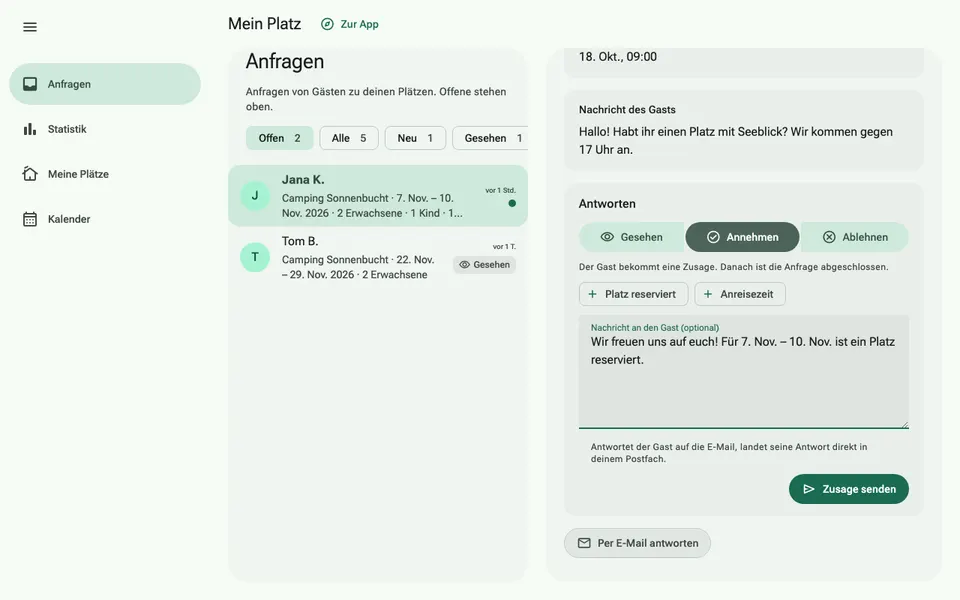
Guests can ask about free dates on your page. The enquiry includes dates, number of people, dogs, vehicle and a message. It arrives by email and in your inbox under “My site” › “Requests”.
How it works
- Open the enquiry. You see all the guest's details at a glance.
- Choose Accept, Decline or Seen. Templates such as “Pitch reserved” fill in the reply for you.
- Add a few words if needed and send. The guest receives your reply by email and can write back to you directly.
Enquiries go to the email address stored for your site. If it's wrong or missing, write to martin@via.camp.
6. Connect your occupancy calendar
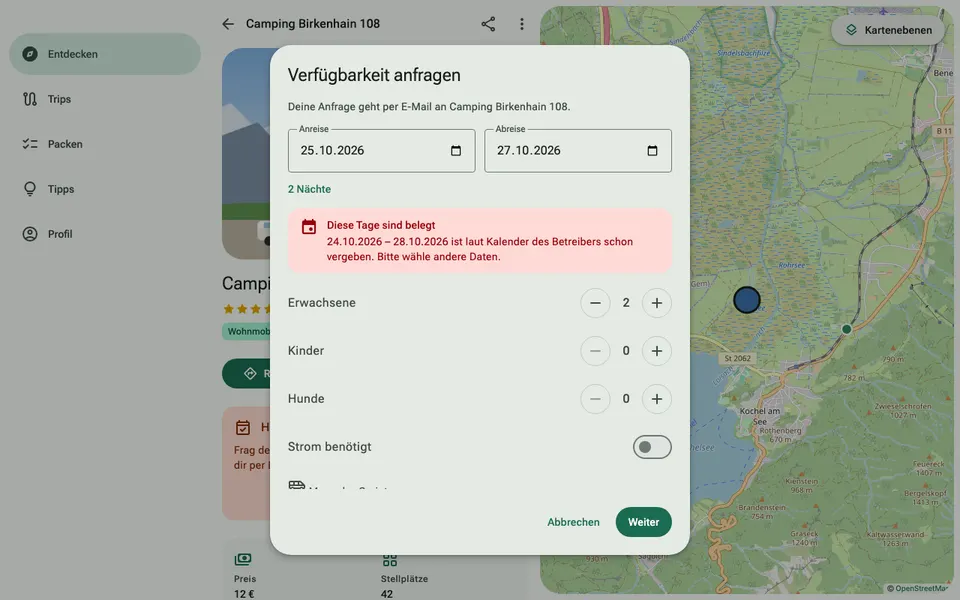
If you use a booking system, ViaCamp can take over your booked days. If a guest asks about booked days, they see a note straight away and cannot send the enquiry. This saves you from having to say no.
How it works
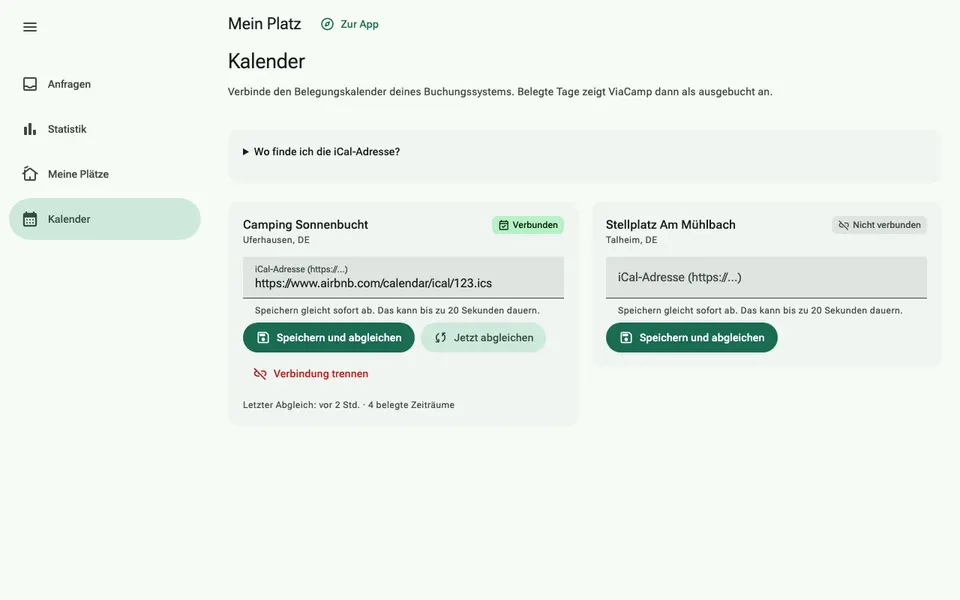
- In your booking system, look for “Export calendar”, “iCal” or “Calendar link”. Airbnb, Booking.com and many campsite programs offer this. You get an address that usually ends in .ics.
- Open “My site” › “Calendar”, paste the address next to the right site and tap “Save and sync”.
- ViaCamp syncs the calendar once a day. “Sync now” does it straight away.
7. Understand your statistics
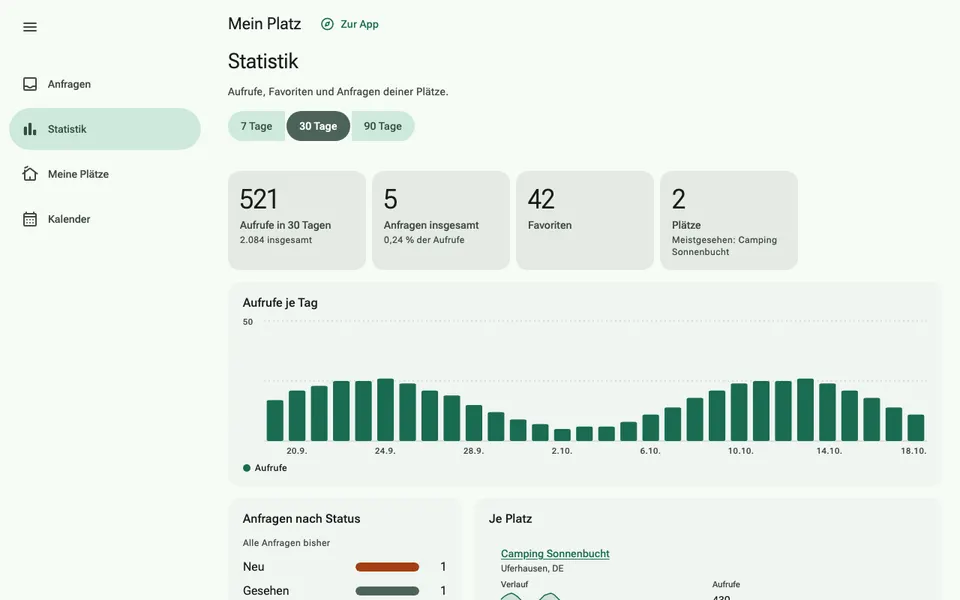
Under “My site” › “Statistics” you can see how your listing is doing. Choose 7, 30 or 90 days at the top.
- Views: how often your site's page was opened.
- Requests: how many guests sent an enquiry, and how many of them are open, accepted or declined.
- Favourites: how many campers saved your site to their list.
8. Dealing with reviews
Guests can rate your site with stars and a short text. Reviews help other campers decide, and they help you see your site through your guests' eyes.
How it works
- Ask happy guests for a review when they leave, for example with a small notice at reception.
- Take criticism seriously. If a point is fair, fix it and mention it in your description.
- If a review breaks the rules, for example with insults or false statements, write to martin@via.camp. We check every report.
9. Become even more visible
A well-kept listing is the foundation. If you want more, there are three options, all of them optional.
- Featured: a star highlights your site on the map, clearly labelled. Free for good for the first operators.
- Your own website: a new one from €499, or a website check of your existing site.
- Instagram management: regular posts that you approve beforehand.
10. A finished listing in 30 minutes
To tick off. Print the list or work through it on your phone.
- Account created and site claimed
- Five to ten of your own photos uploaded, the best one last
- Description with what's special, season, dogs, arrival time and prices
- Facilities ticked: water, electricity, toilet, shower, Wi-Fi, dogs, black water
- Type of site, number of pitches, height limit entered
- Address, phone number and website checked
- Email address for enquiries is correct
- Occupancy calendar connected (if you use a booking system)